Getting started with Intersalon
When you receive your activation email, you can login immediately. You'll also see we have created a selection of test stylists, services and products. You can either edit these to your liking, or delete and start afresh.
Setting up Intersalon for first use may seem daunting - but in just 3 steps, you'll be nearly there.
1 - Stylists
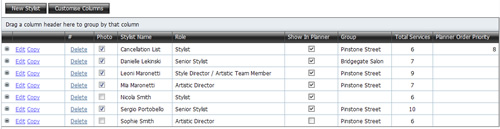
We'll start by adding your stylists into the salon software. We've tried to speed up the setup process by combining all stylist options on one page. Selecting New Stylist from the Stylist and Services area will allow you to enter stylist details, photos and online-booking options. You'll also be able to choose an existing role, or 'Add New'. A salon role might be 'Senor Stylist' or 'Trainee'. If you are running multiple salons or different departments, you should use the Salon Group option to split different stylists into these areas.
2 - Services
Setting up your services and treatments is very similar to setting up stylists - we just have to link them together. First input some basic information about the service - base price, duration and descriptions. As with stylists, consider using Groups to seperate your services - this will also make it easier to navigate through the planner menu.
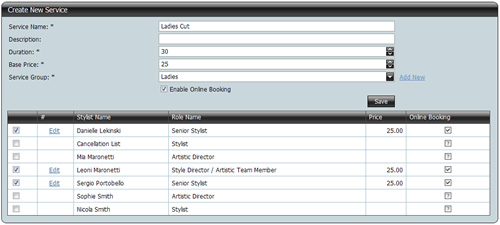
Once you've press the Save button you'll see a list of your stylists appear below. You can now enable the service on a per stylist basis. As you enable stylists, you will see that the service/stylist price is automatically created from the base price. If your stylists have different rates, you can easily adjust by clicking on the edit link on the left side of the stylist row. Adjust the price to your requirements, and press Update. This will only affect the stylist you selected.
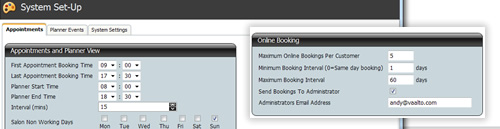
3 - Settings
Most of the hard work is now complete, but you should finish your system setup with a look through Intersalon's settings area. You'll need to setup your planner start and end times, and select any non-working days. There are more details on the remaining settings in our other guides. You can also create planner events to block out time for lunch breaks or training periods. Finally ensure your system settings are correct - do you require a PIN code for on-the-fly discounts, or any extra customer information fields.